Google Form
Submit Google Form to create an event automatically
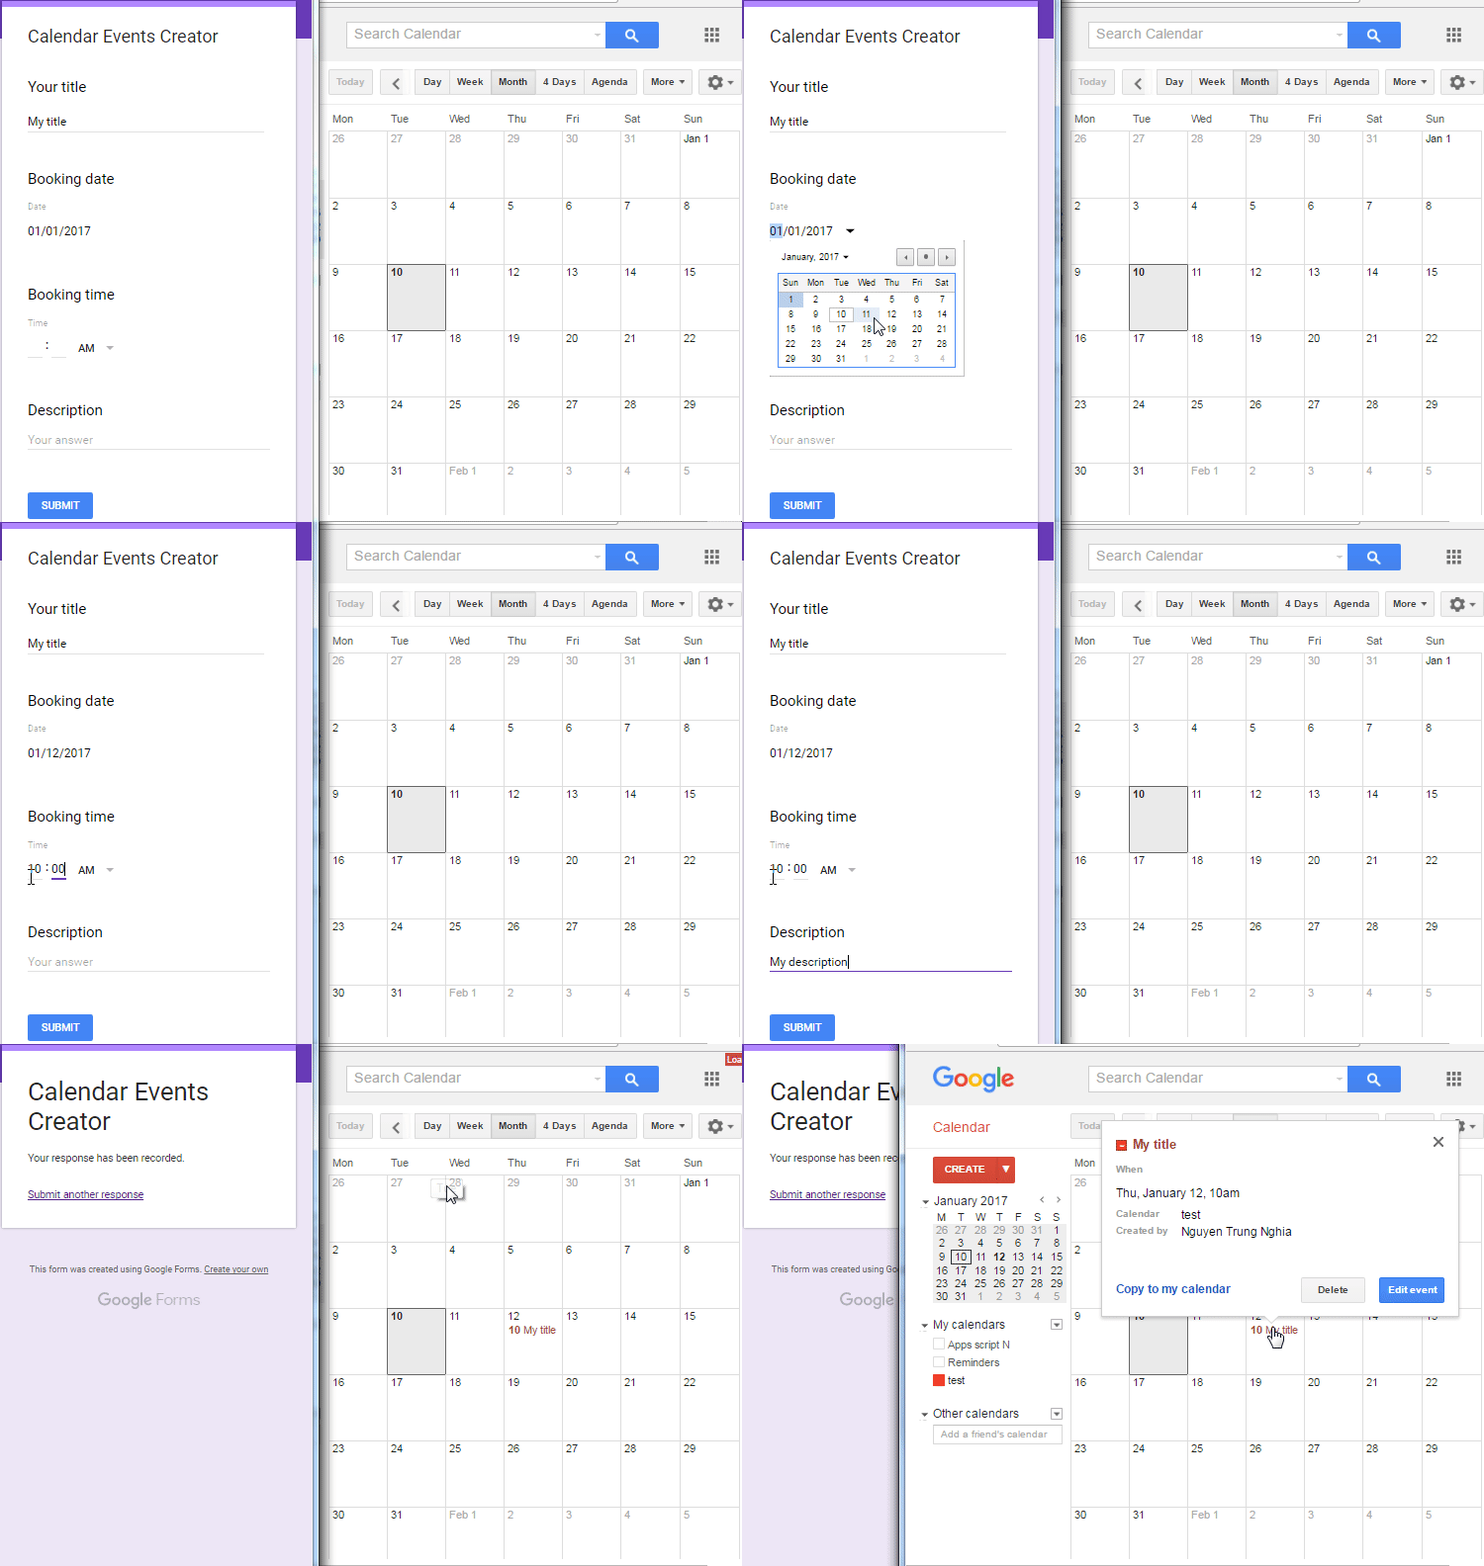
Google Calendar
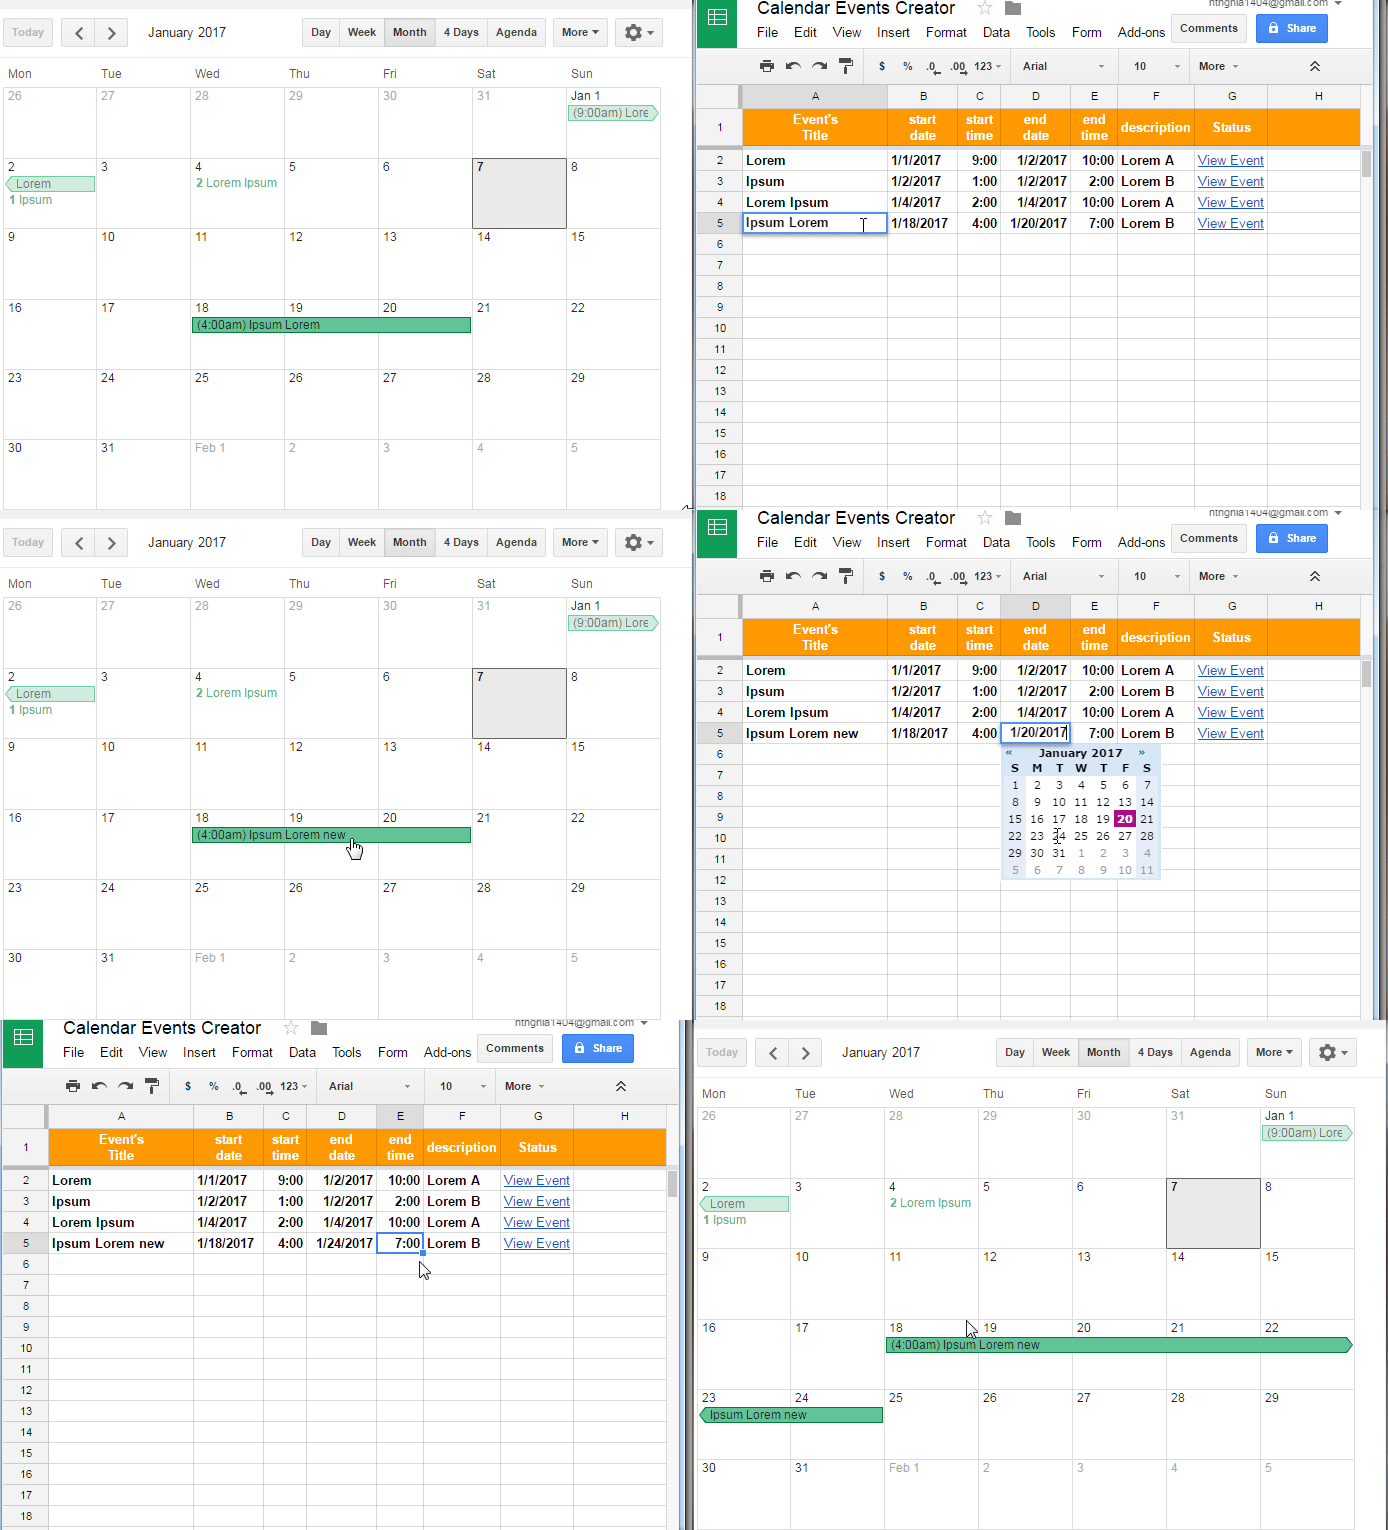
Booked events are shown in Google Calendar
Submit Google Form to create an event automatically

Booked events are shown in Google Calendar
The booking(s) from Google Form will automatically show in Google Calendar when the form was submitted.
In just a few clicks, you can create multiple events from your spreadsheet.
Creates Google Calendar events from your spreadsheet or Google Form

Any changes on the spreadsheet will automatically reflect in the Google Calendar.
The title and description of events can be customized programmatically. E.g: the title can contain start date field, location field, etc..
You can actively send an email to the support team regarding any issues.
 |
(*) billed annually
Debit or credit cards (Visa, MasterCard, American Express,...) are accepted. Paypal account is accepted.
 |
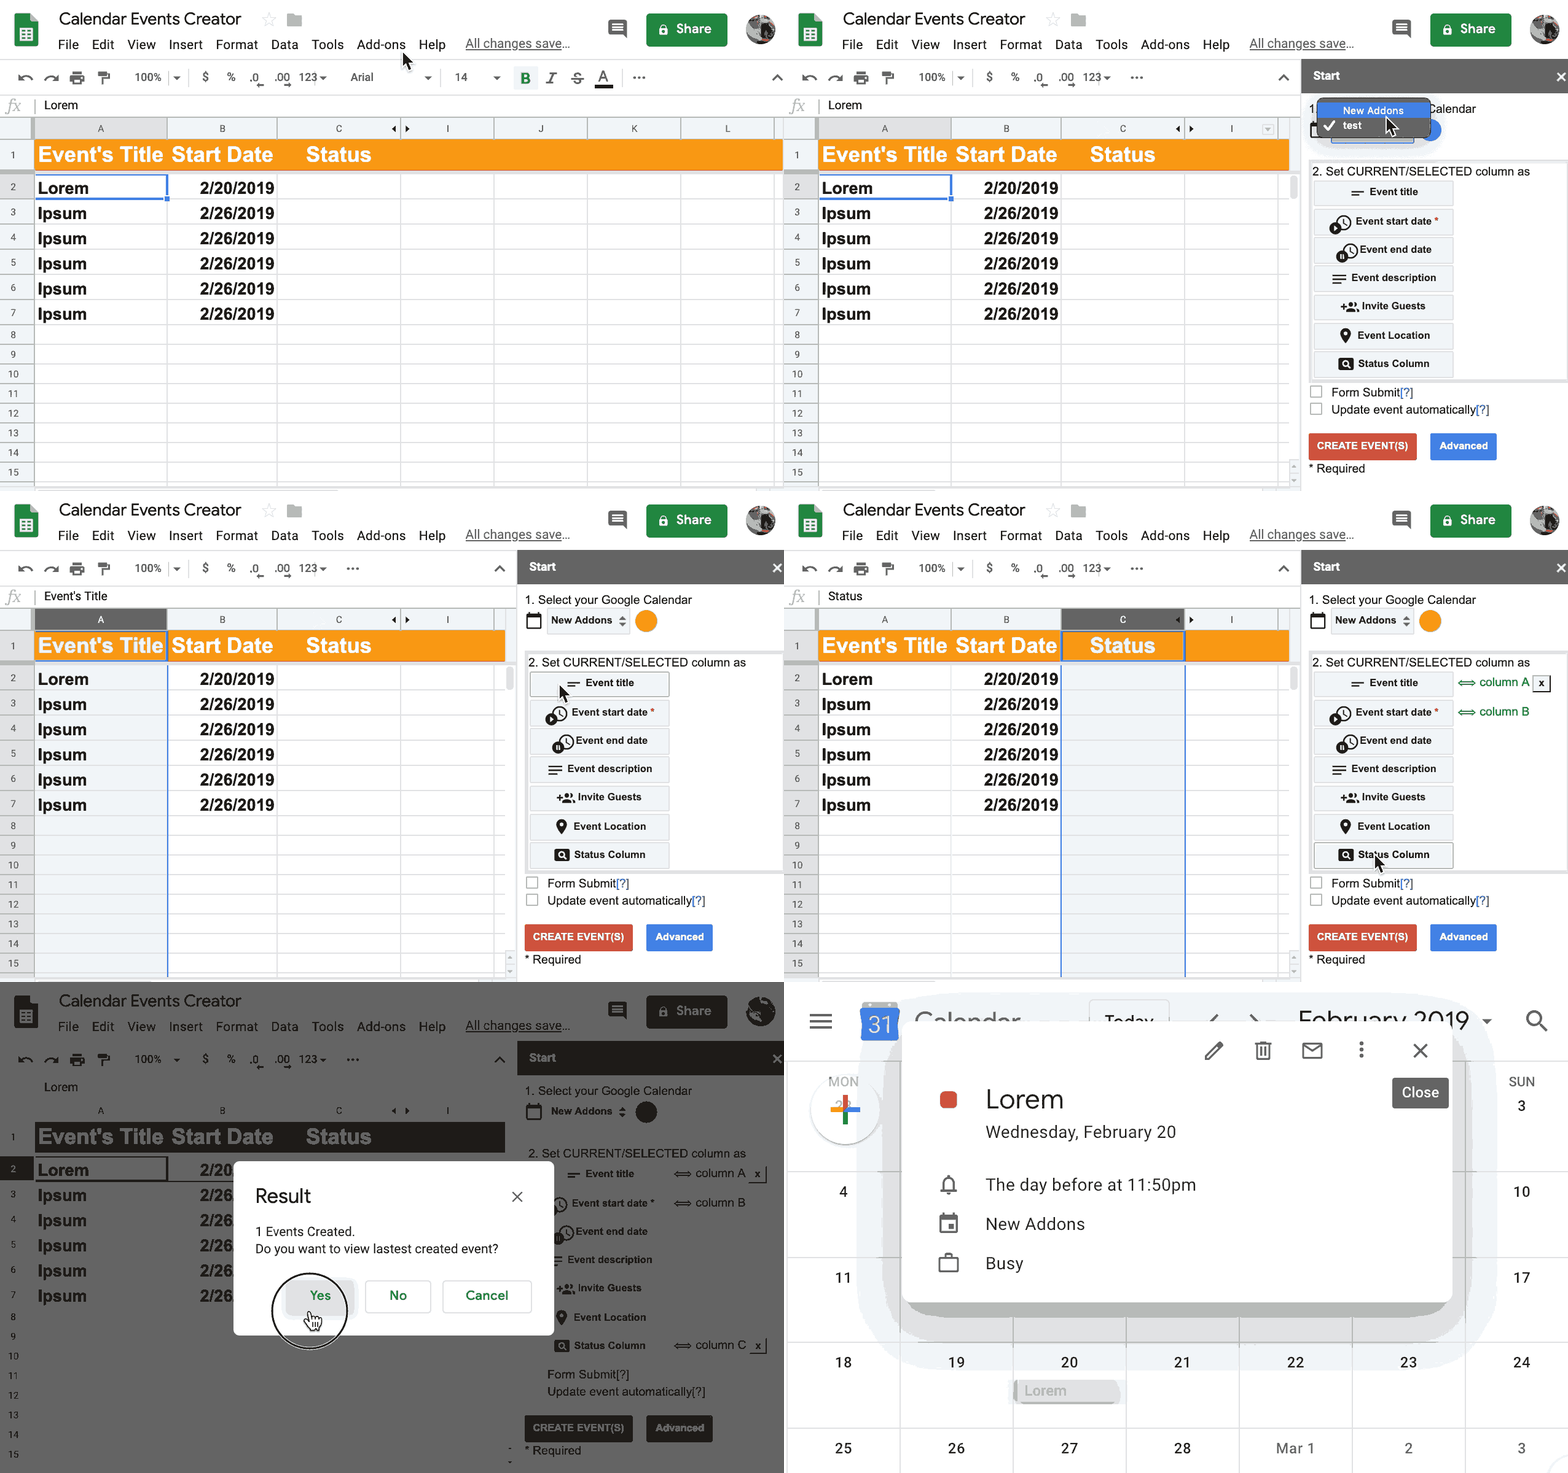
Add-ons menu → Calendar Events Creator → Start
Event Start Date on the right sidebar to set the
date of the selected column to be the start date of the event.
Status column button.
Create event(s) button
to create an event for the row (details of the event will come from the selected
row's data).
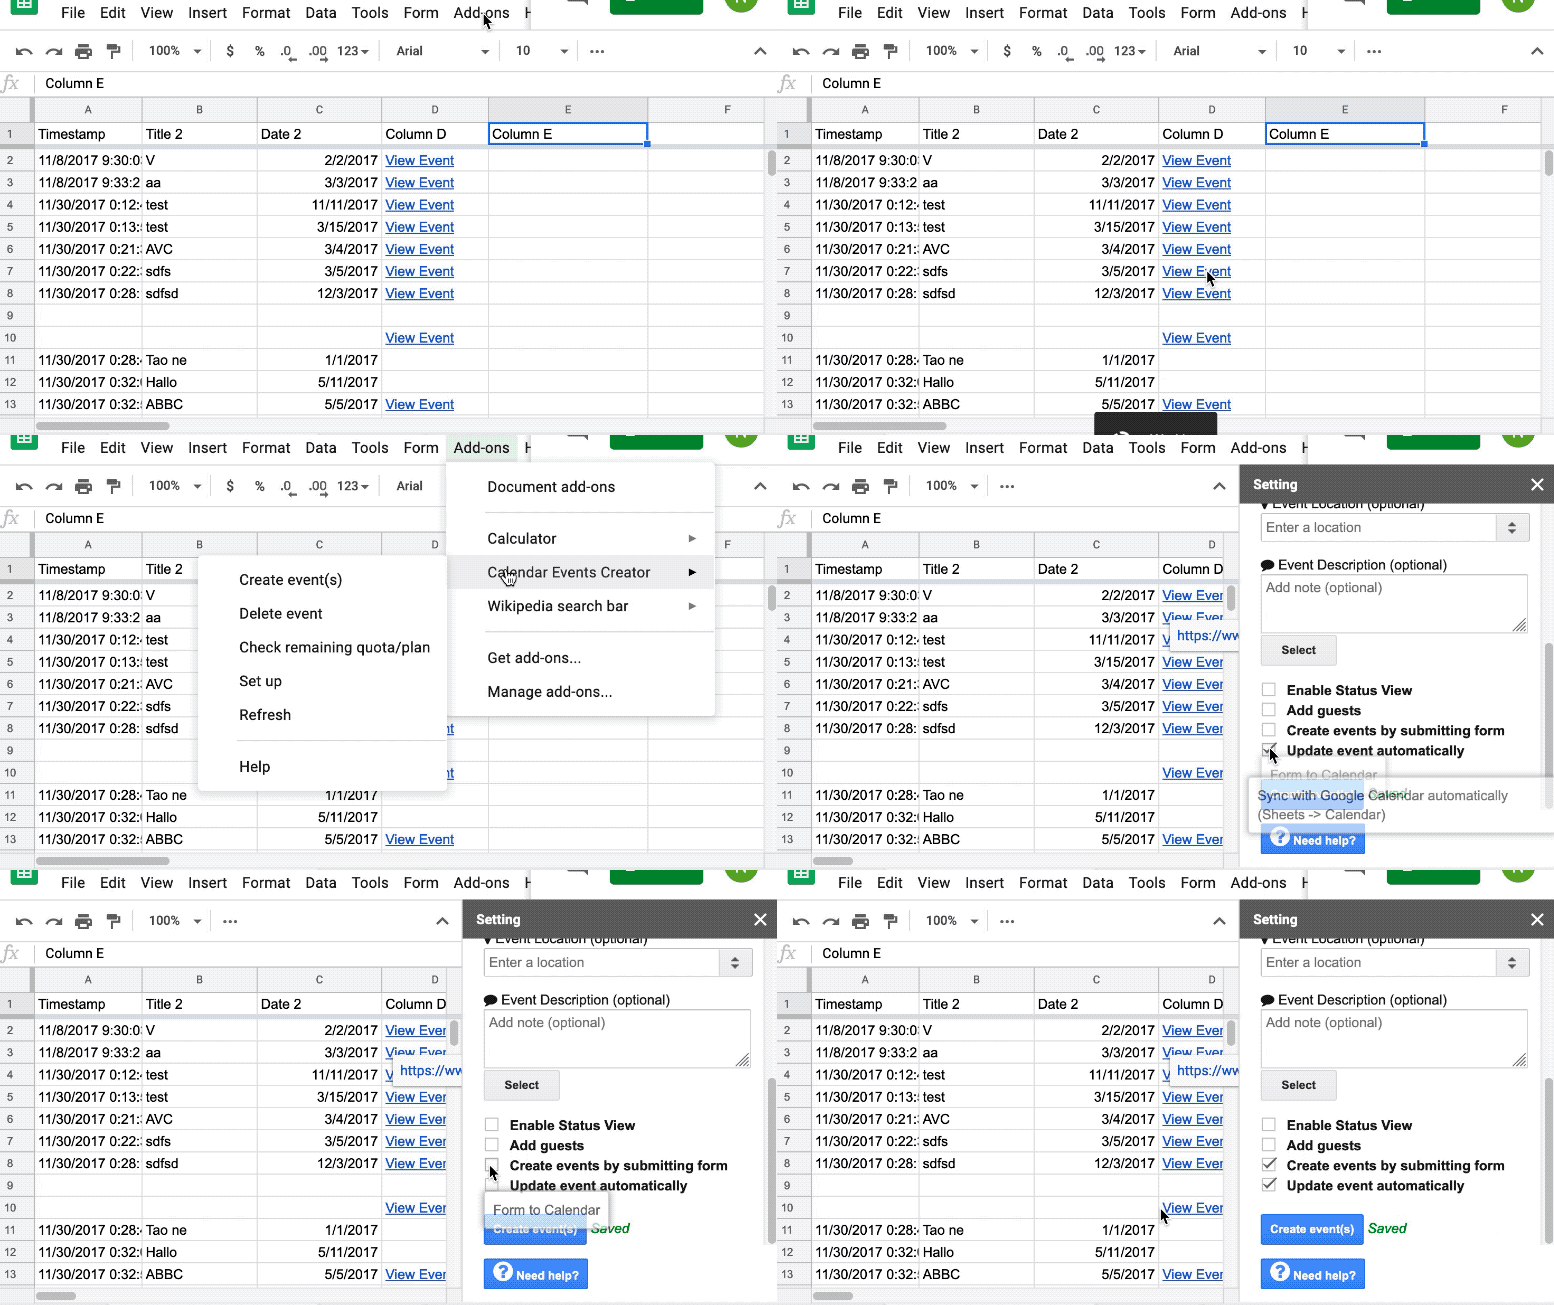
✅ Form submit to automatically create event by
submitting a form.✅ Update event automatically to automatically
create event when new data row added or update event if changing
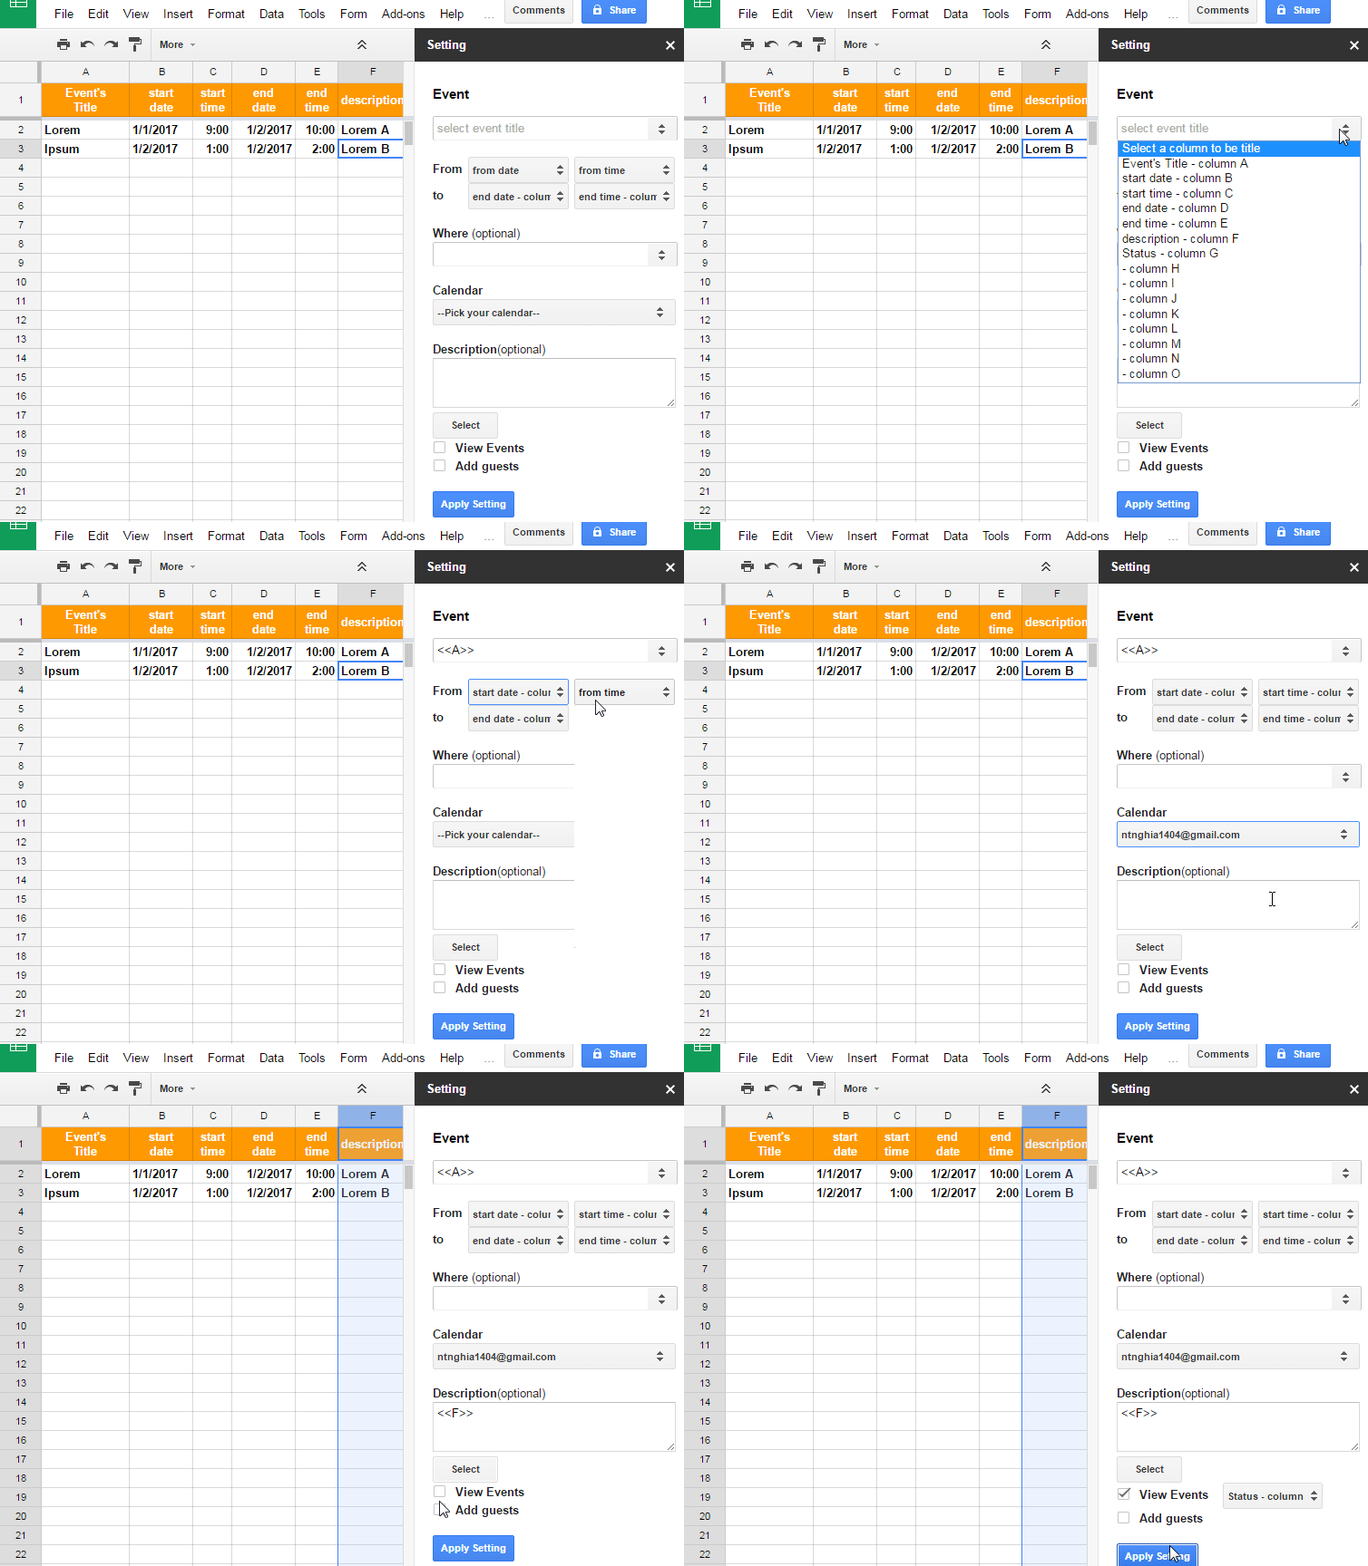
spreadsheet data.Add-ons menu → Calendar Events Creator → Set up
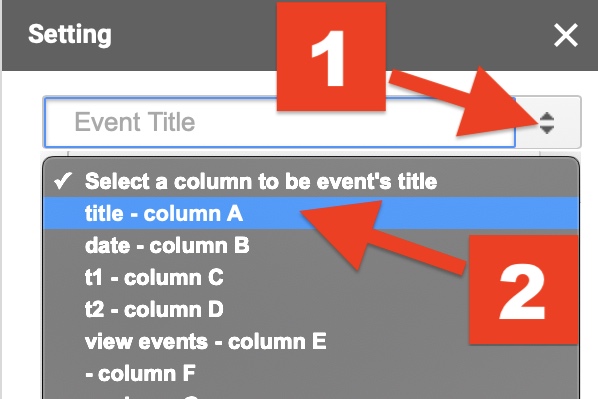
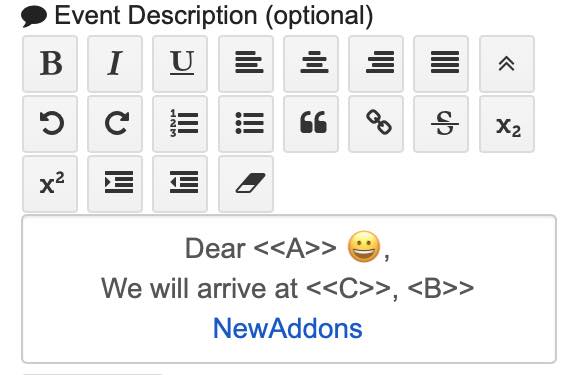
Hi <<A>>
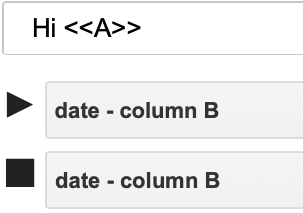
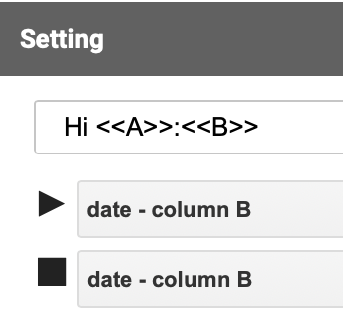
<<A>> is column A. It means that the add-on will add values of column A to calendar.
Some examples:
| The Sheet | The Setting | The Created Event |
|---|---|---|

|
|

|

|
|

|

|

|

|
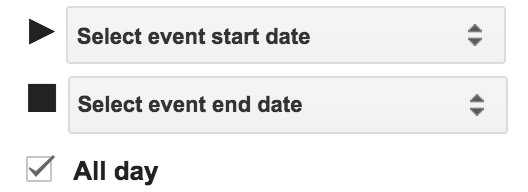
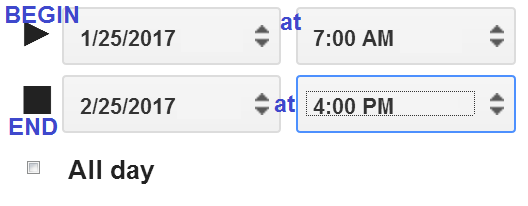
All day to add event start time and
event end time.Apply Setting to save the setting.Add-ons > Calendar Events Creator > Create event(s)to
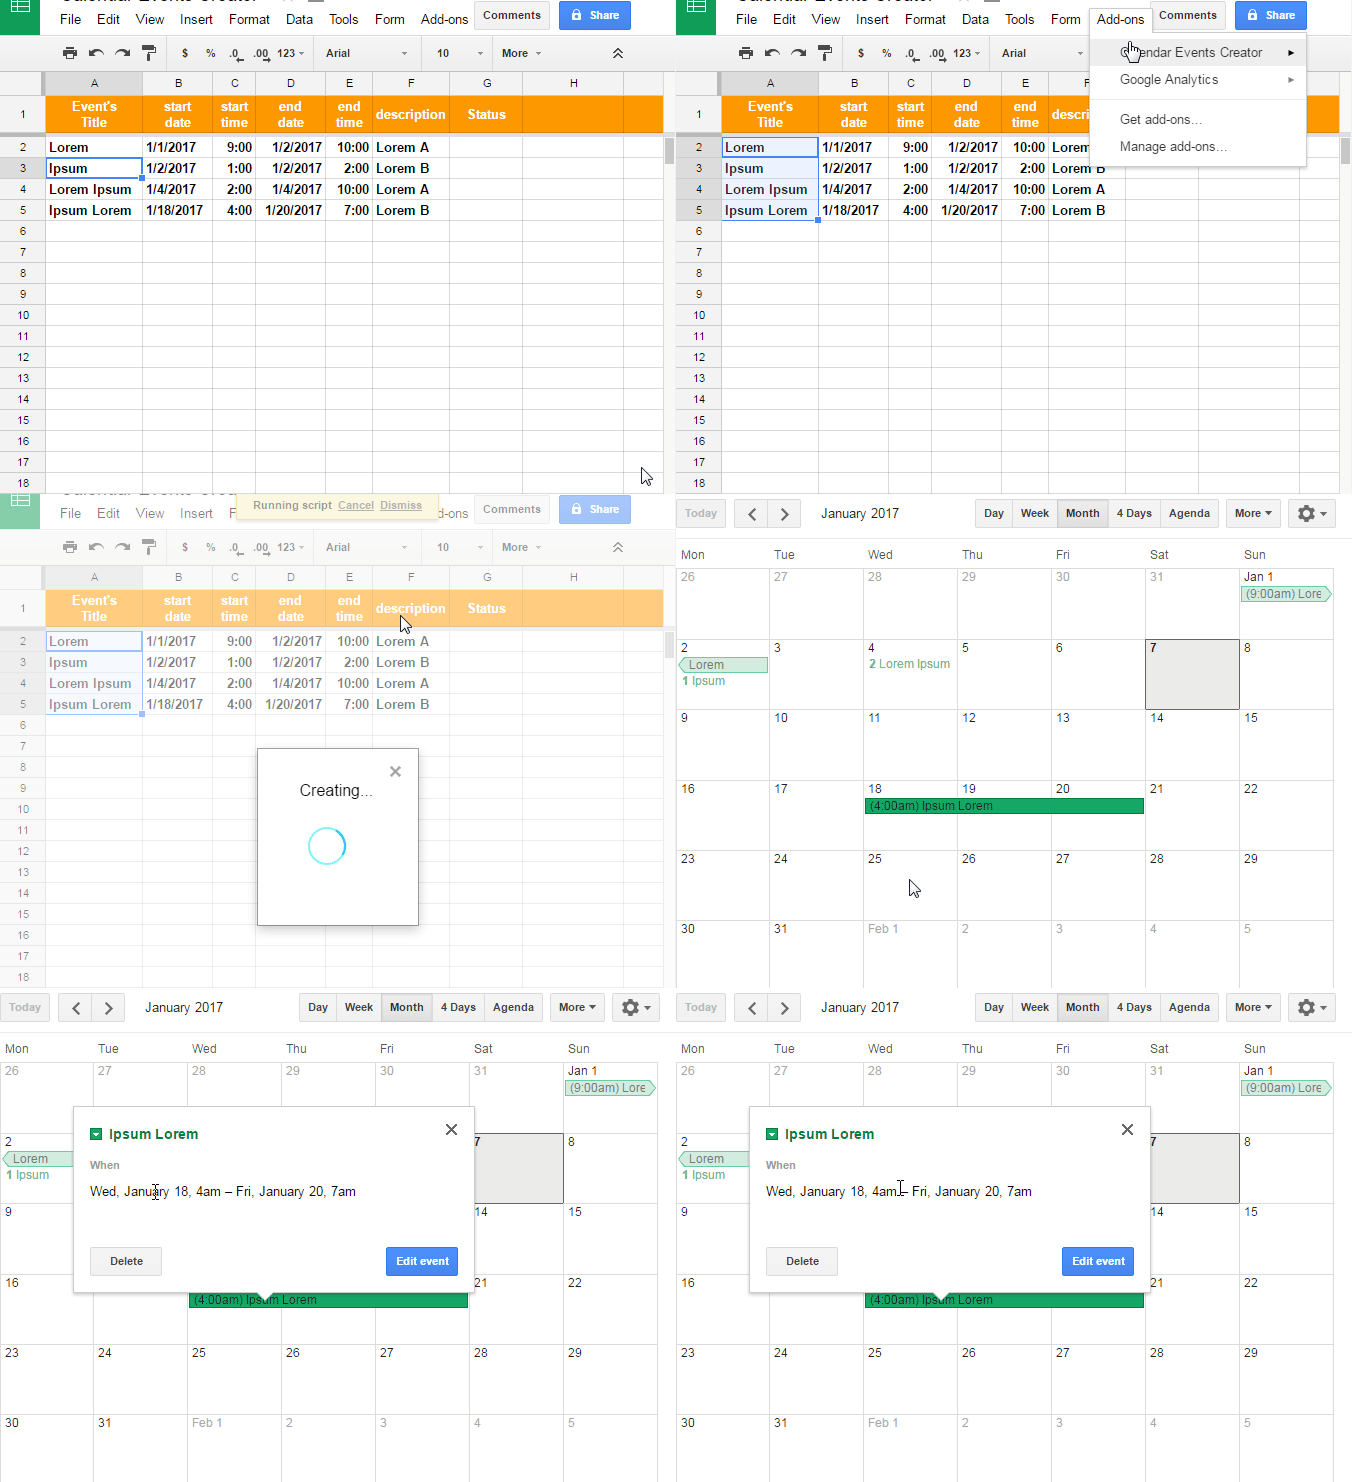
create an event for the selected row.
✅ Repeat and choose
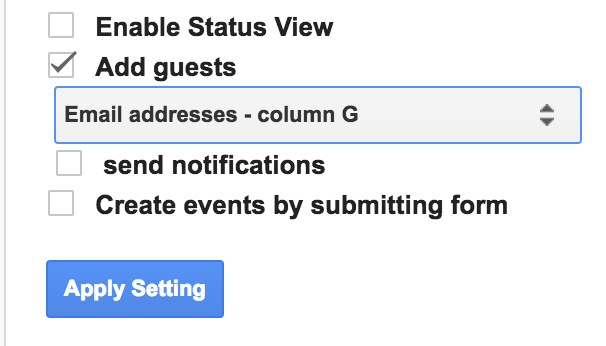
daily, weekly, monthly, yearlyCheck ✅ Add guests and choose a column contains
email addresses
Use comma , to separate email addresses. E.g.
acc1@gmail.com, acc2@gmail.com
Open your Google Sheets spreadsheet.
Select the entire row or any cell in a row, then choose
Add-ons menu → Calendar Events Creator → Create Event(s).
Open Google Sheets
Select a range of rows you want to create events and choose
Add-ons menu → Calendar Events Creator → Create Event(s)
Choose Add-ons menu → Calendar Events Creator → Start
→ Check ✅Update event automatically
When changing a spreadsheet row data or adding a new row of data, the created event will be updated or created automatically.
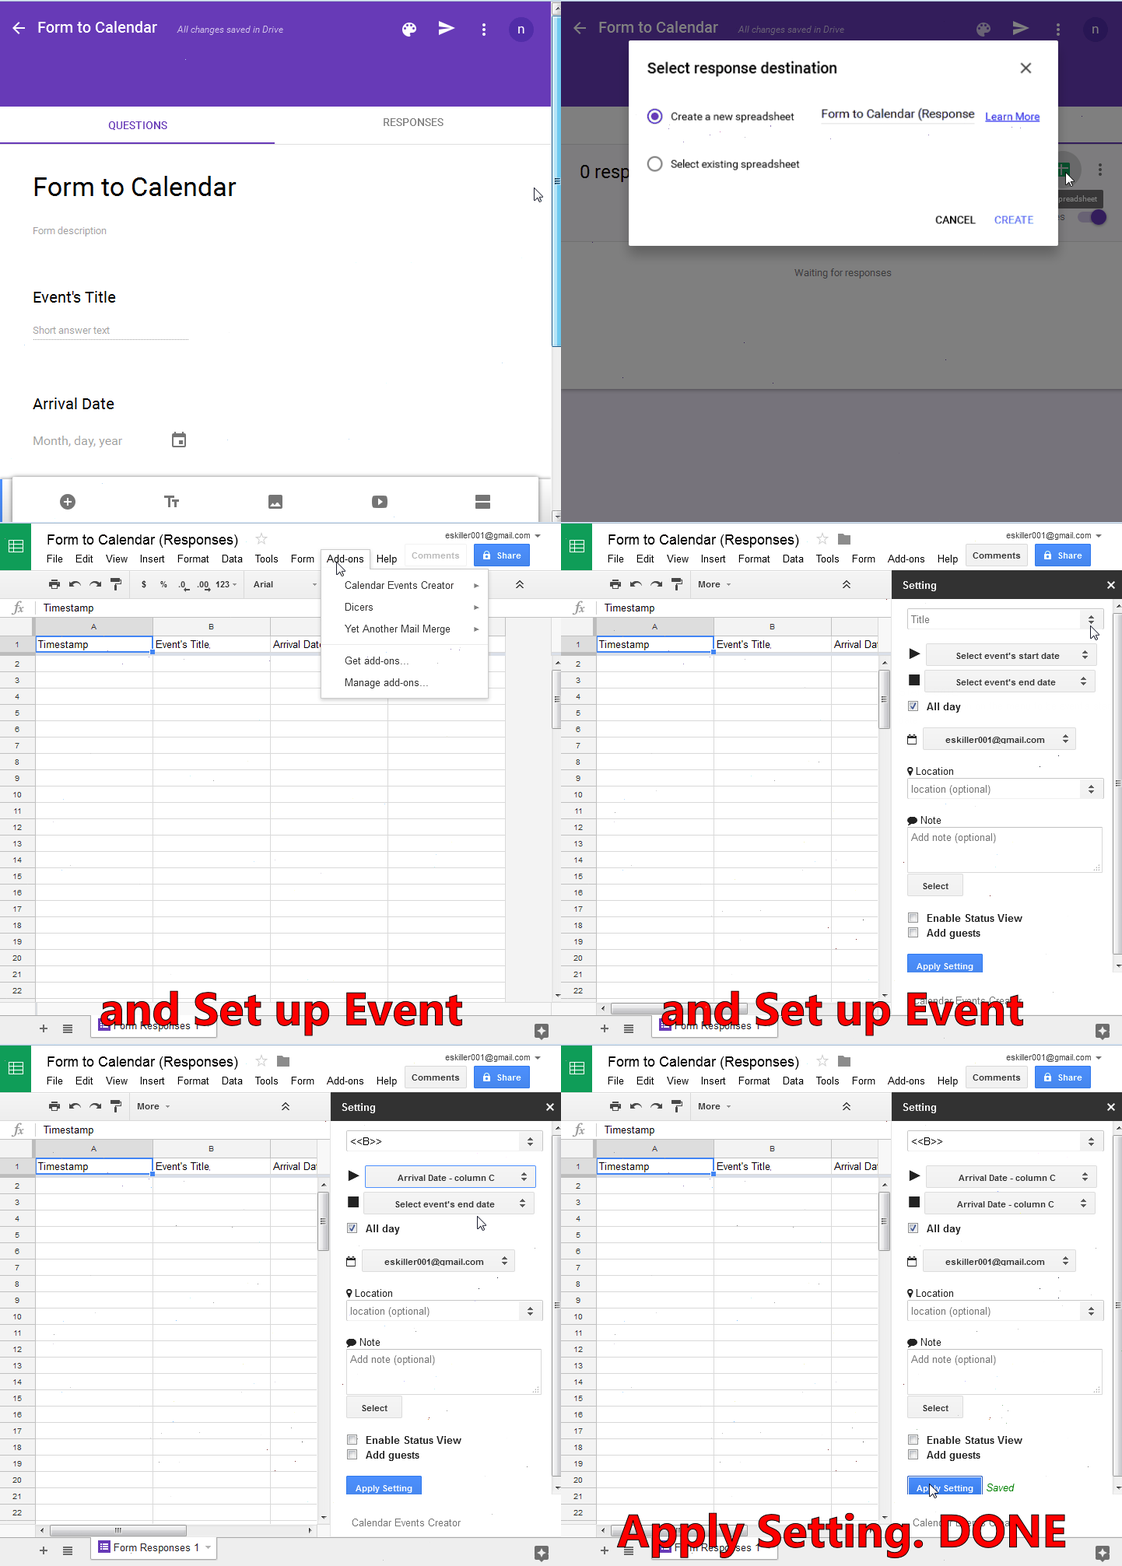
Step 1. Create a Google Form.
Step 2. Create a spreadsheet for responses in Google Sheets.
Step 3. Set up the add-on. (As shown on question number 1. )
Step 4. Check ✅Create events by submitting form . Then
click Apply Setting.
Step 1: Open the setting by choosing
Add-ons menu → Calendar Events Creator → Set up
Step 2: Check ✅Enable status view
Step 3: Select a column to view created events' hyperlink.
Step 4: Click Apply Setting.
The Calendar Events Creator saves the add-on's setting under your email address so that it can remember your setting to create events exactly what you need.
Free, 10We do not share, transfer or sell any of your information to other companies.
This is how to delete the add-on's setting for a current
sheet:Add-ons menu → Calendar Events Creator → Refresh.
If you do not want us to store your data (the add-on forgets all your settings forever), you can send us your request.
Choose the
Add-ons menu → Calendar Events Creator → Check remaining quota/plan
to check your plan.
If it keep saying quota 0, try the below solution:
If it doesn't work, please remove the add-on and install it again:
from your Google Spreadsheet → Add-ons menu → Manage add-ons... → Calendar Events Creator → Manage → Remove
Add-ons menu → Get add-on → Search 'Calendar Events Creator’ → Click Free icon → Follow steps
You can cancel your subscription anytime. Once the subscription is cancelled, you will not be charged next year. You will continue to use the add-on to create events until your current subscription expires.
When you buy a license for Calendar Events Creator add-on, a recurring payment is automatically set on your customer profile through PayPal. This is how to cancel this auto-renew:
! Important note: Uninstall/remove the add-on do not cancel the auto-renewal of your Calendar Events Creator subscription.
Current and Past charges are non-refundable. When you cancel a subscription, your paid account will continue to be accessible for the duration of your prepaid subscription period.
If you purchase a subscription to Calendar Events Creator addon that automatically renews, you may cancel the subscription any time before the end of the current billing period and the cancellation will take effect on the next billing period. You will retain access to the service from the time you cancel until the start of the next billing period, and will not receive a refund or credit for any remaining days in your current billing period. Subscription fees paid are final and nonrefundable, unless otherwise determined by the New Addons. If New Addons reasonably determines that a user has violated these Terms of Service, New Addons may immediately terminate the subscription and the user’s access to Calendar Events Creator add-on without notice and without refund. Refund requests should be directed to admin@newaddons.com.
Solution 1: Check if the event time is valid. If the event date/time is invalid, event will not be created on the calendar.
A valid date is right-aligned and has a calendar
picker. See below::
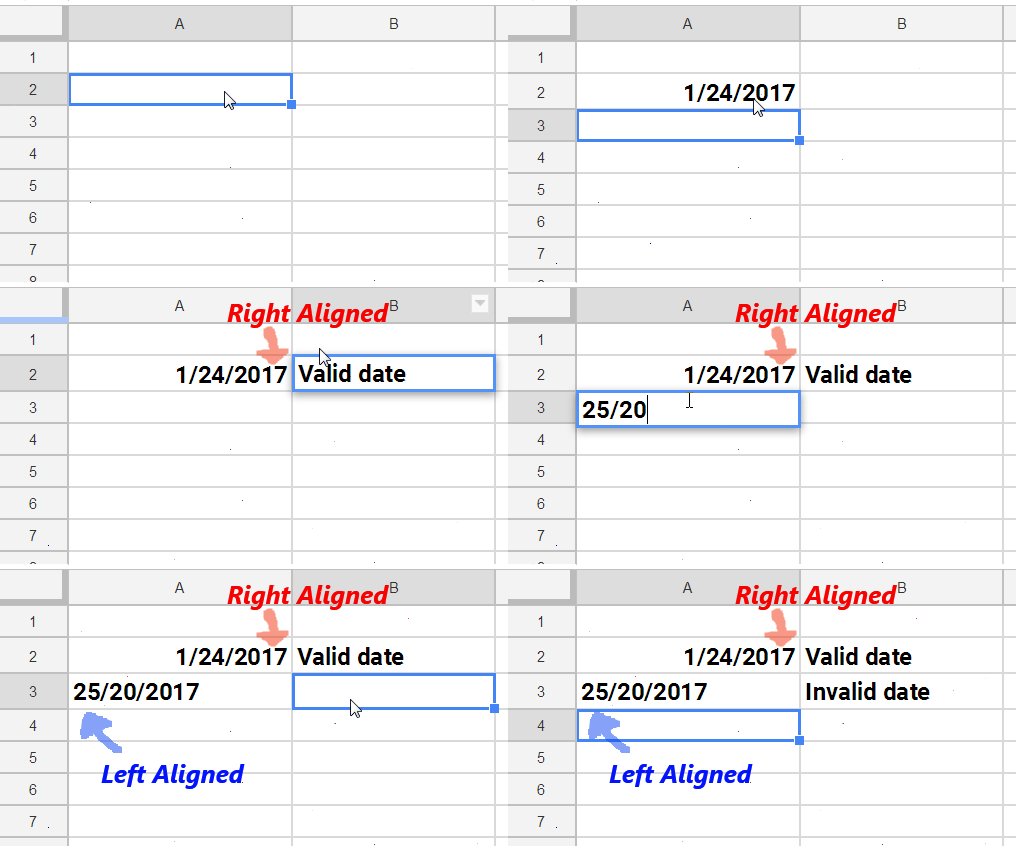
Note: Event start date/time should be sooner than the event end
date/time.
Solution 2: Select the correct column for the event time.
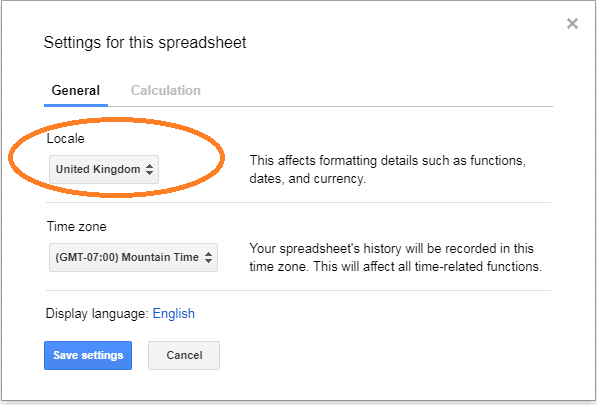
Solution 3: Set the date format. The add-on may not understand your event date format correctly. Set the spreadsheet locale to yours by going to File →Spreadsheet settings...
Google Sheets spreadsheet → Add-ons menu → Manage add-ons... → Calendar Events Creator → Manage → Remove
Add-ons menu → Get add-on → Search 'Calendar Events Creator’ → Click Free icon → Follow steps
Ctrl+Shift+N) or a different browser.
Chrome browser.
More.
More tools and then
Clear browsing data.
All time.
Cookies and other site data and
Cached images and files.
Clear data.
Example: EmailAddress1@example.com, EmailAddress2@example.com, EmailAddress3@example.com
=JOIN(",",H5:I5)
Change your spreadsheet's timezone and Google Calendar's timezone to Eastern Time - Toronto.
My calendars ➡️ choose your calendar ➡️ click
More ➡️ Settings and sharing ➡️ click
Time zone, choose Eastern Time - Toronto
Try the below solution:
If it doesn't work, you can remove the add-on and then install it again to solve the problem.
Google Sheets spreadsheet → Add-ons menu → Manage add-ons... → Calendar Events Creator → Manage → Remove
Add-ons menu → Get add-on → Search 'Calendar Events Creator’ → Click Free icon → Follow steps
